¶ License
End User Licence Agreement of IVAO Pilot Software
¶ Important Information
This installation guide is only available and working for the following simulators:
- X-Plane on macOS
¶ Installing Altitude
- To begin the installation process, make sure that X-Plane is not running.
- Firstly, download the Altitude for macOS from the IVAO website
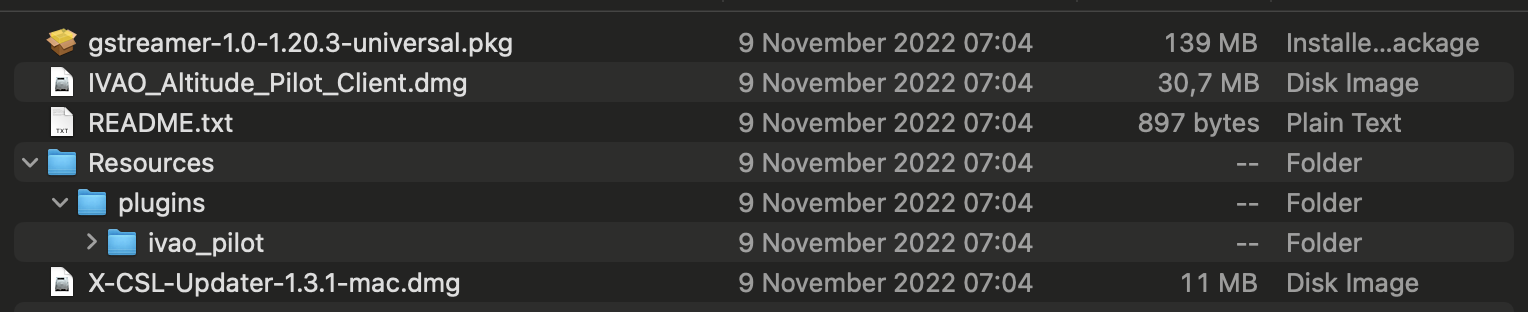
- After downloading is finished, unzip the files to a suitable location.
You should see the zip containing folders below:
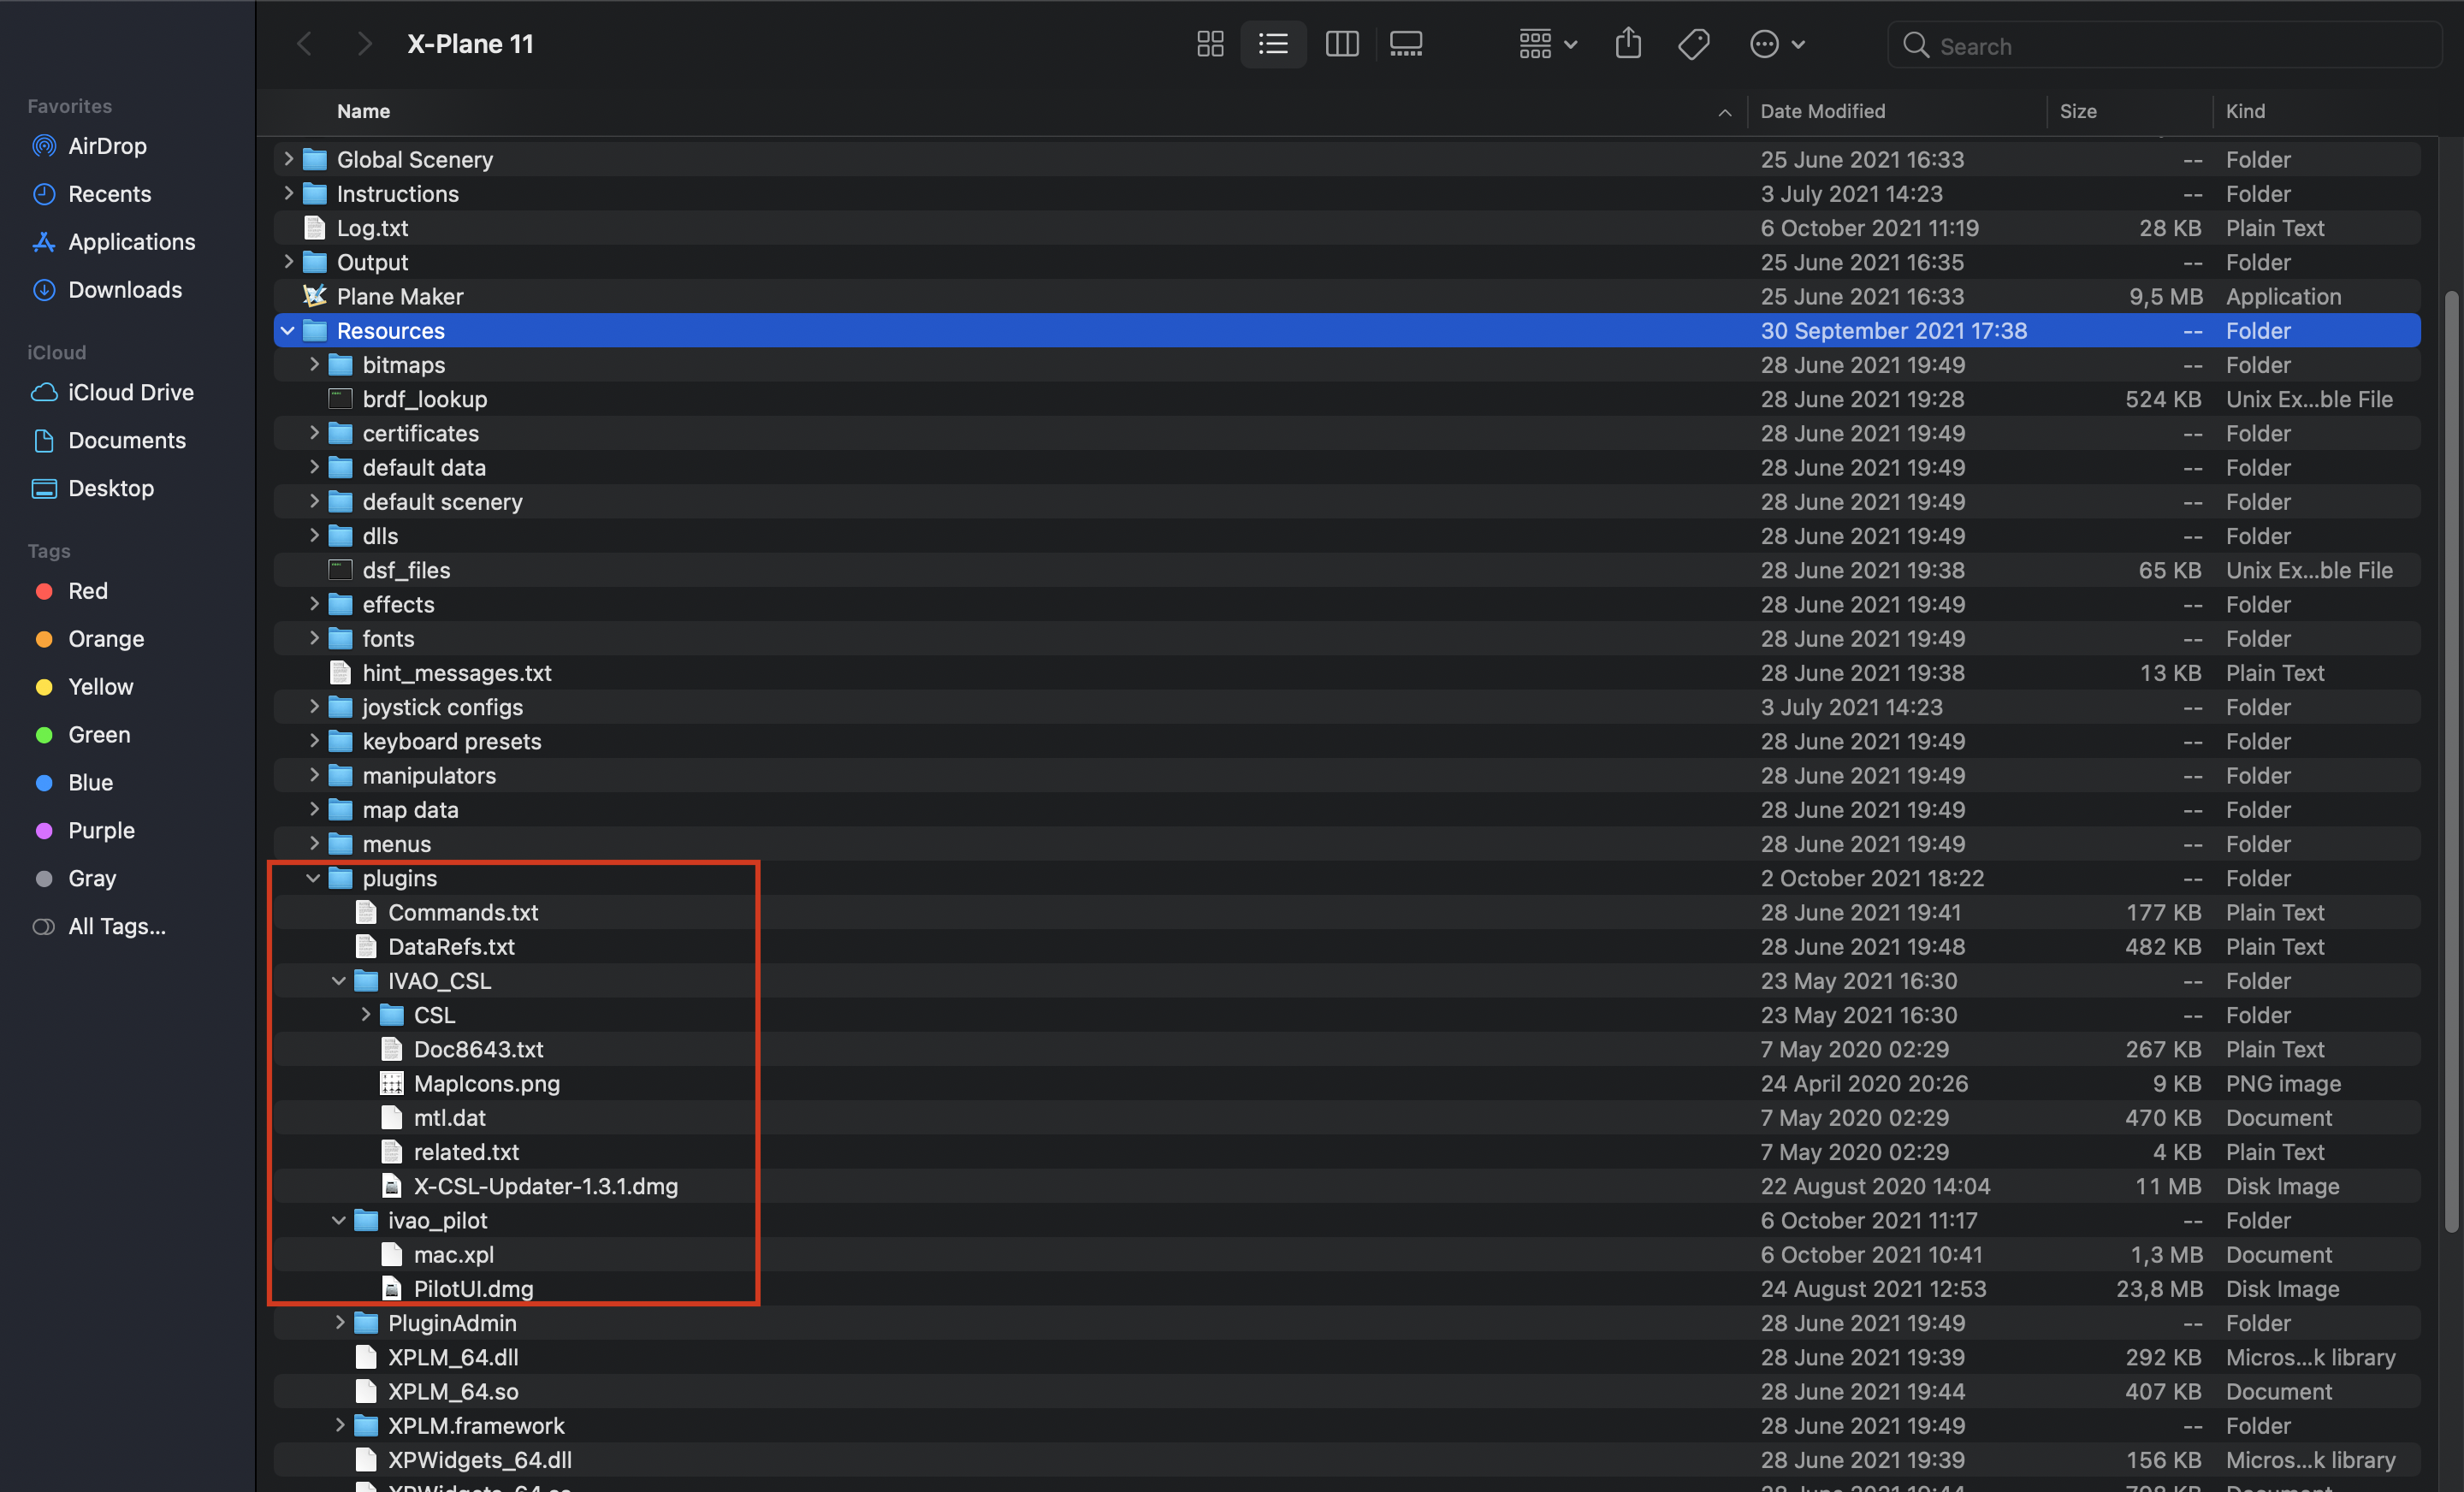
- Navigate to your X-Plane installation folder, which is generally located at:
/Users/[Your Username]/Library/Applications/Steam/steamapps/common/X-Plane11
Please note that the folder location may vary depending on your installation.
- Move both “ivao_pilot” and “IVAO_CSL” folders into X-Plane11's
Rescources/pluginsfolder. - You should have a similar folder layout with the image below:
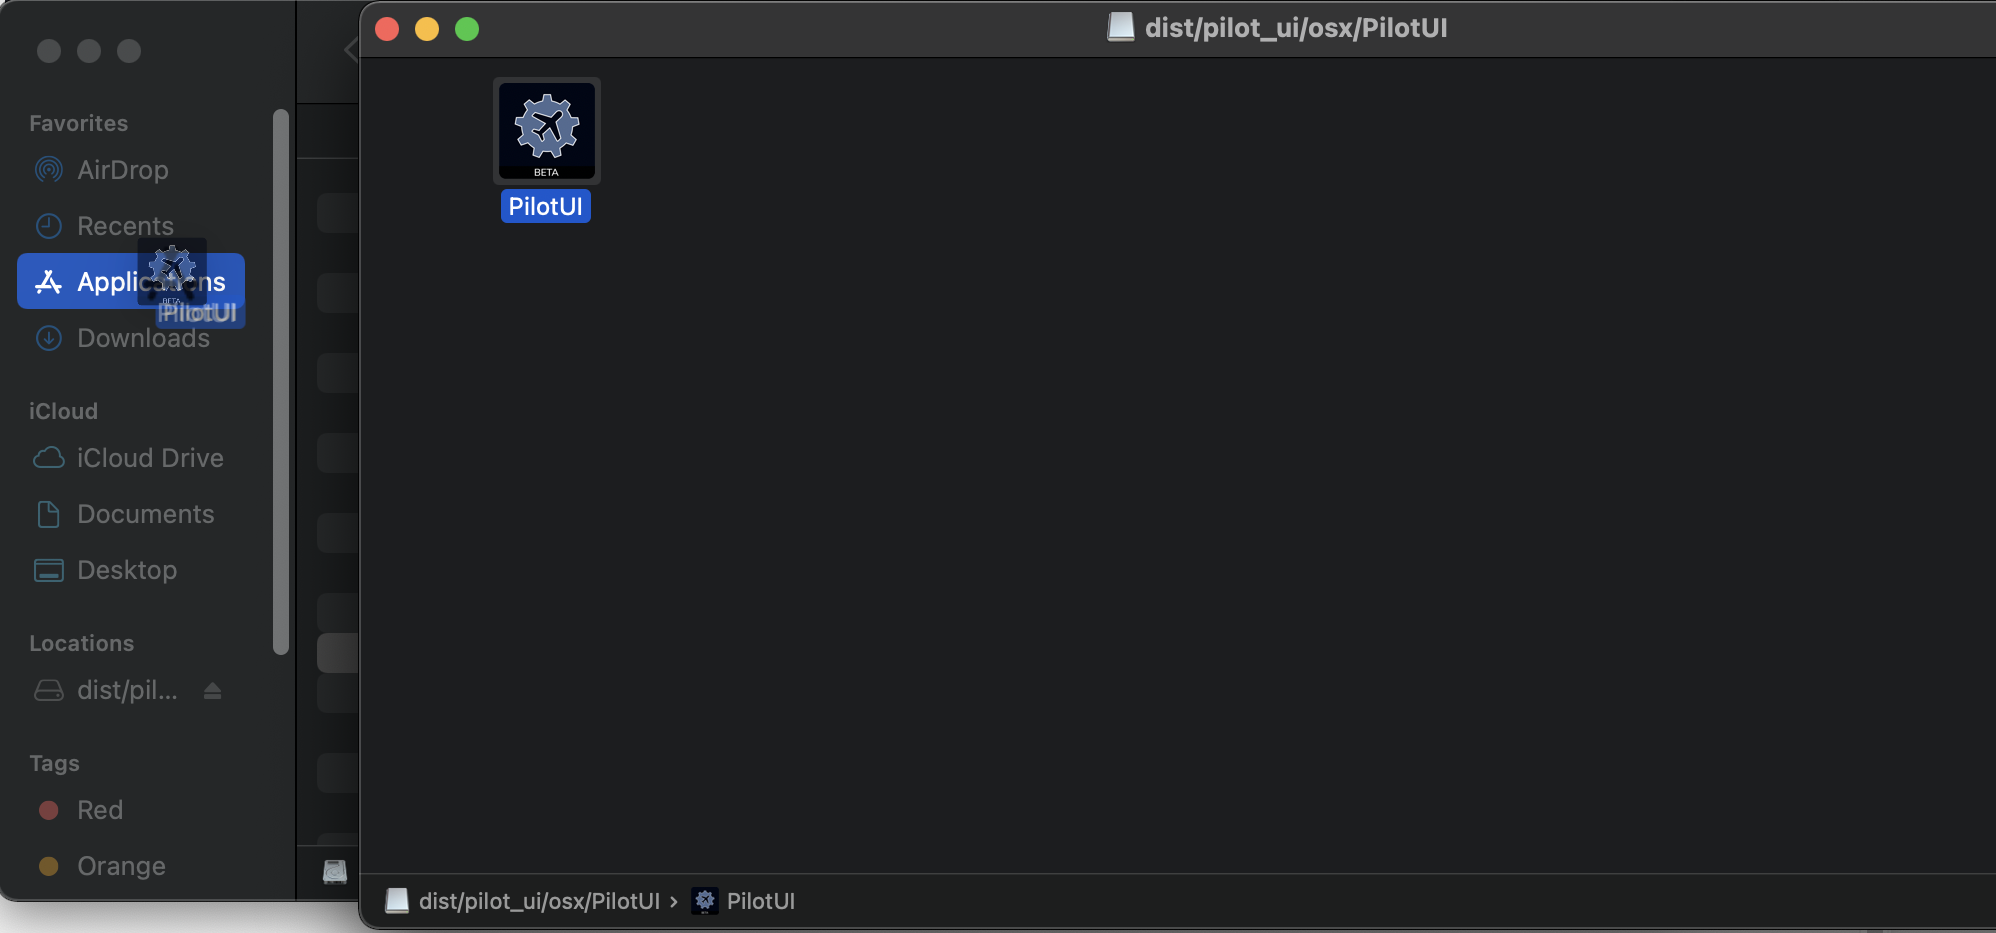
- Open PilotUI.dmg, and move the PilotUI to your Applications folder.
- Finally, run the GStreamer installer, named
gstreamer-1.0-1.20.3-universal.pkgand follow the installation instructions.
¶ Installing X-CSL Package
- X-CSL package allows you to see other multiplayer aircraft precisely.
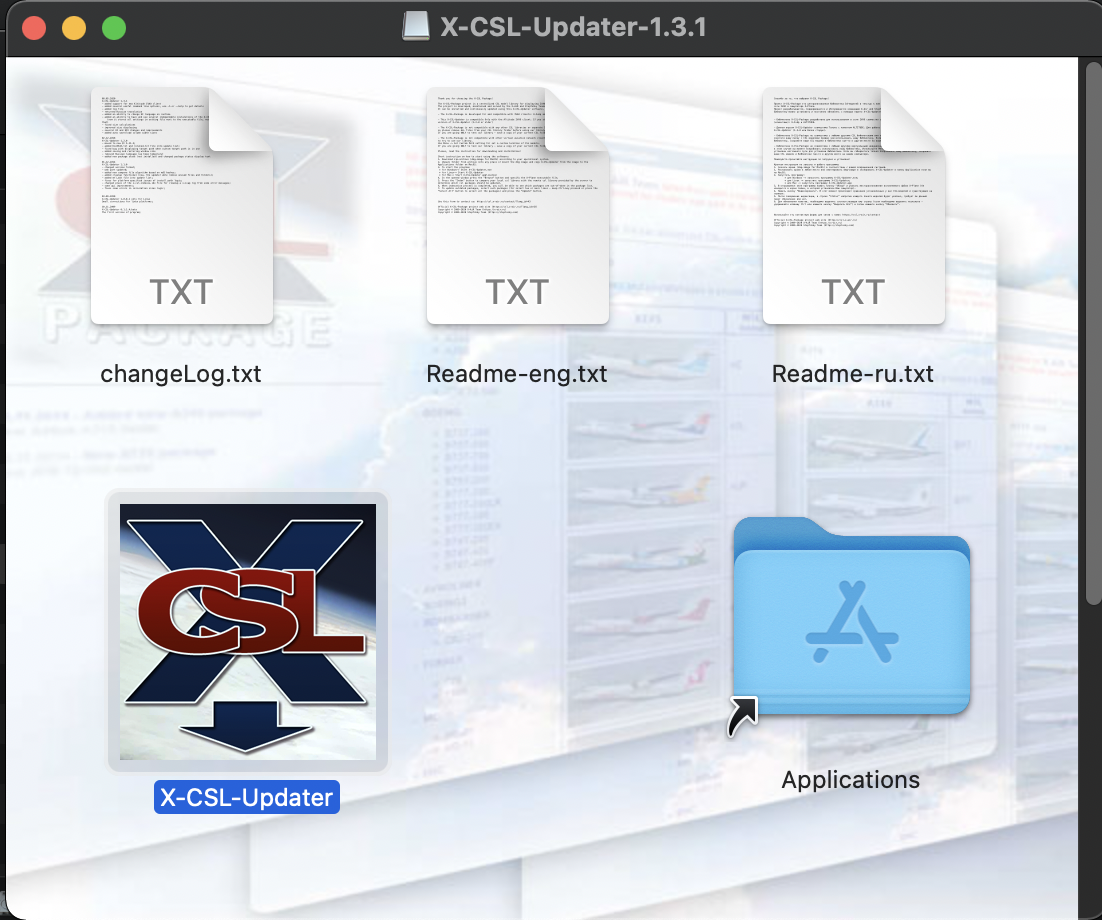
- To install the X-CSL, first, run the
X-CSL-Updater-1.3.1.dmgand move X-CSL-Updater to your Applications folder.
- Run the X-CSL Updater, press Update and your X-CSLs are installed.
¶ Running the X-Plane 11 and Altitude
- After the installations are complete, run the X-Plane 11.
- If you receive an error similar to below:
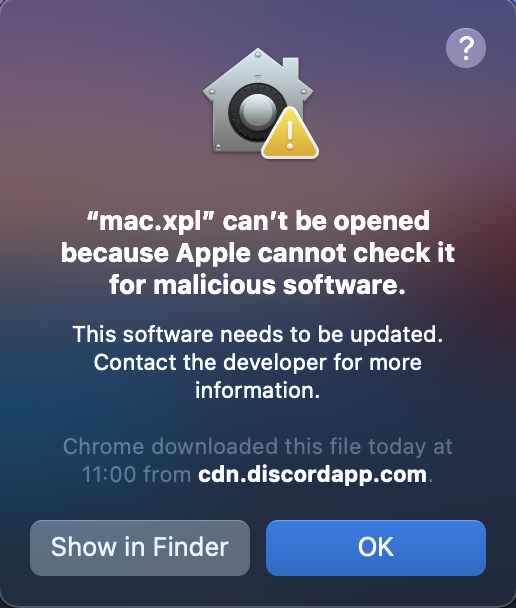
- Press OK and go to your System Preferences → Security & Privacy → General tab and allow mac.xpl.
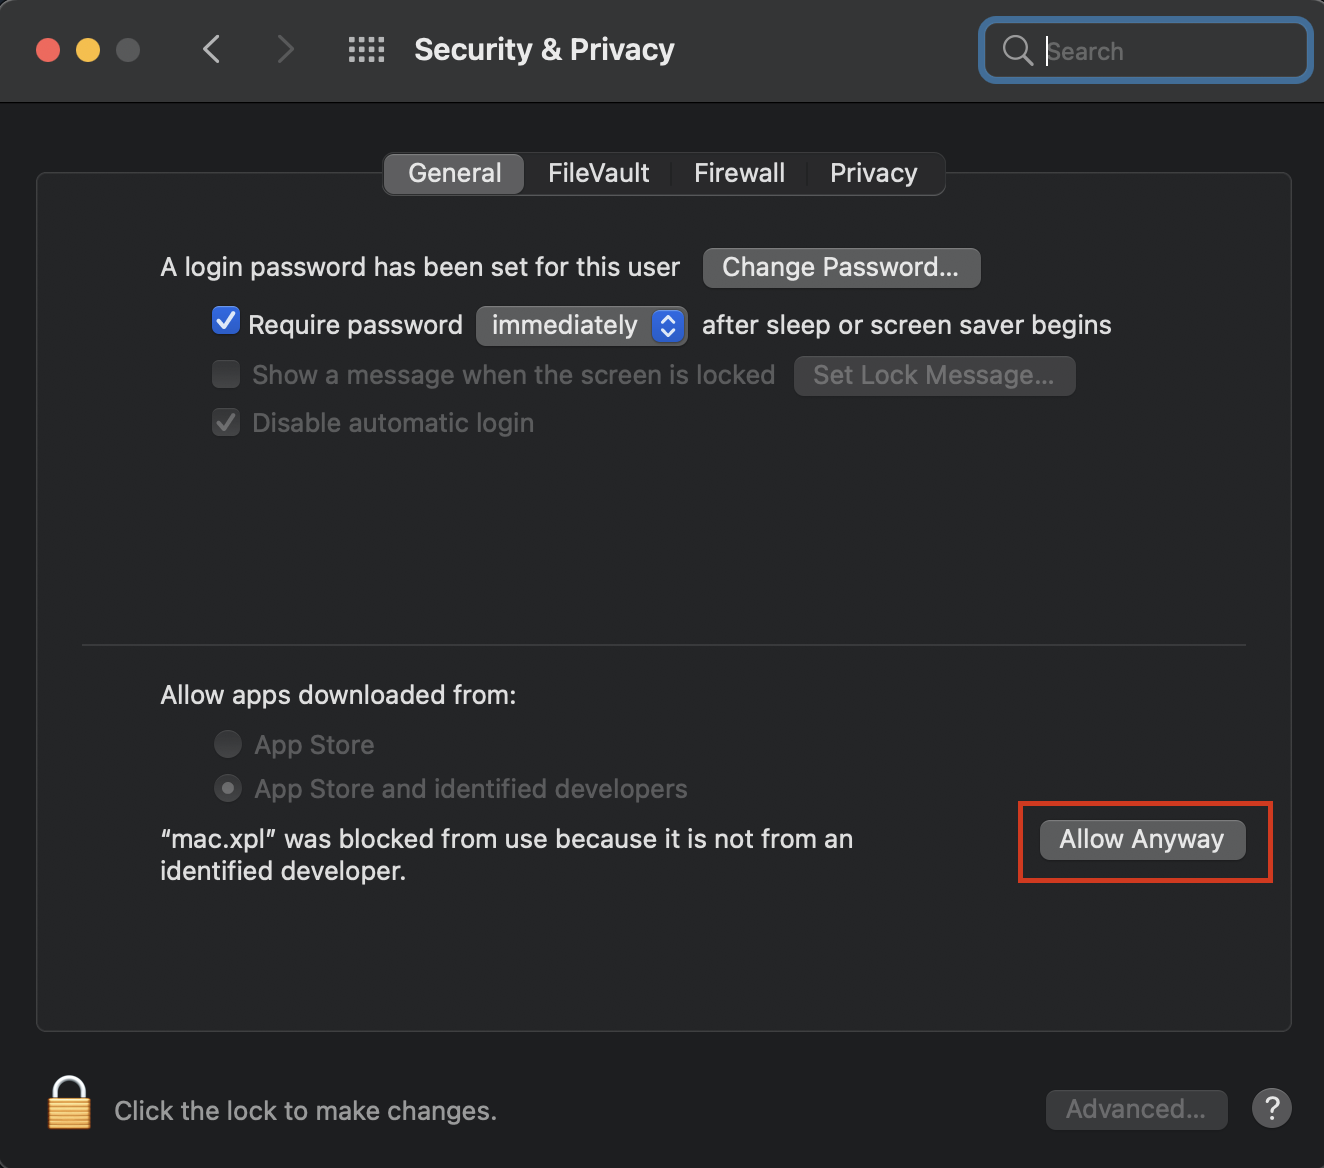
- After allowing mac.xpl, close and reopen your simulator.
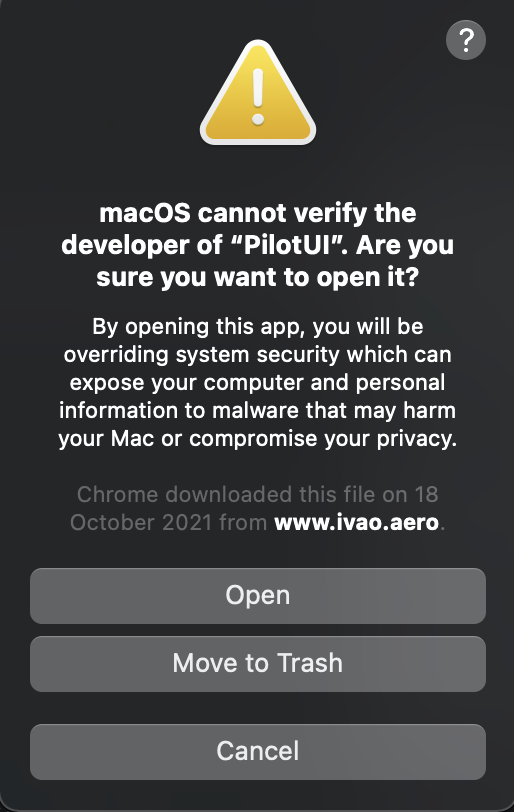
- When spawned at a gate, hold the control key and open the PilotUI from your Applications folder

- Press Open to the dialog below.
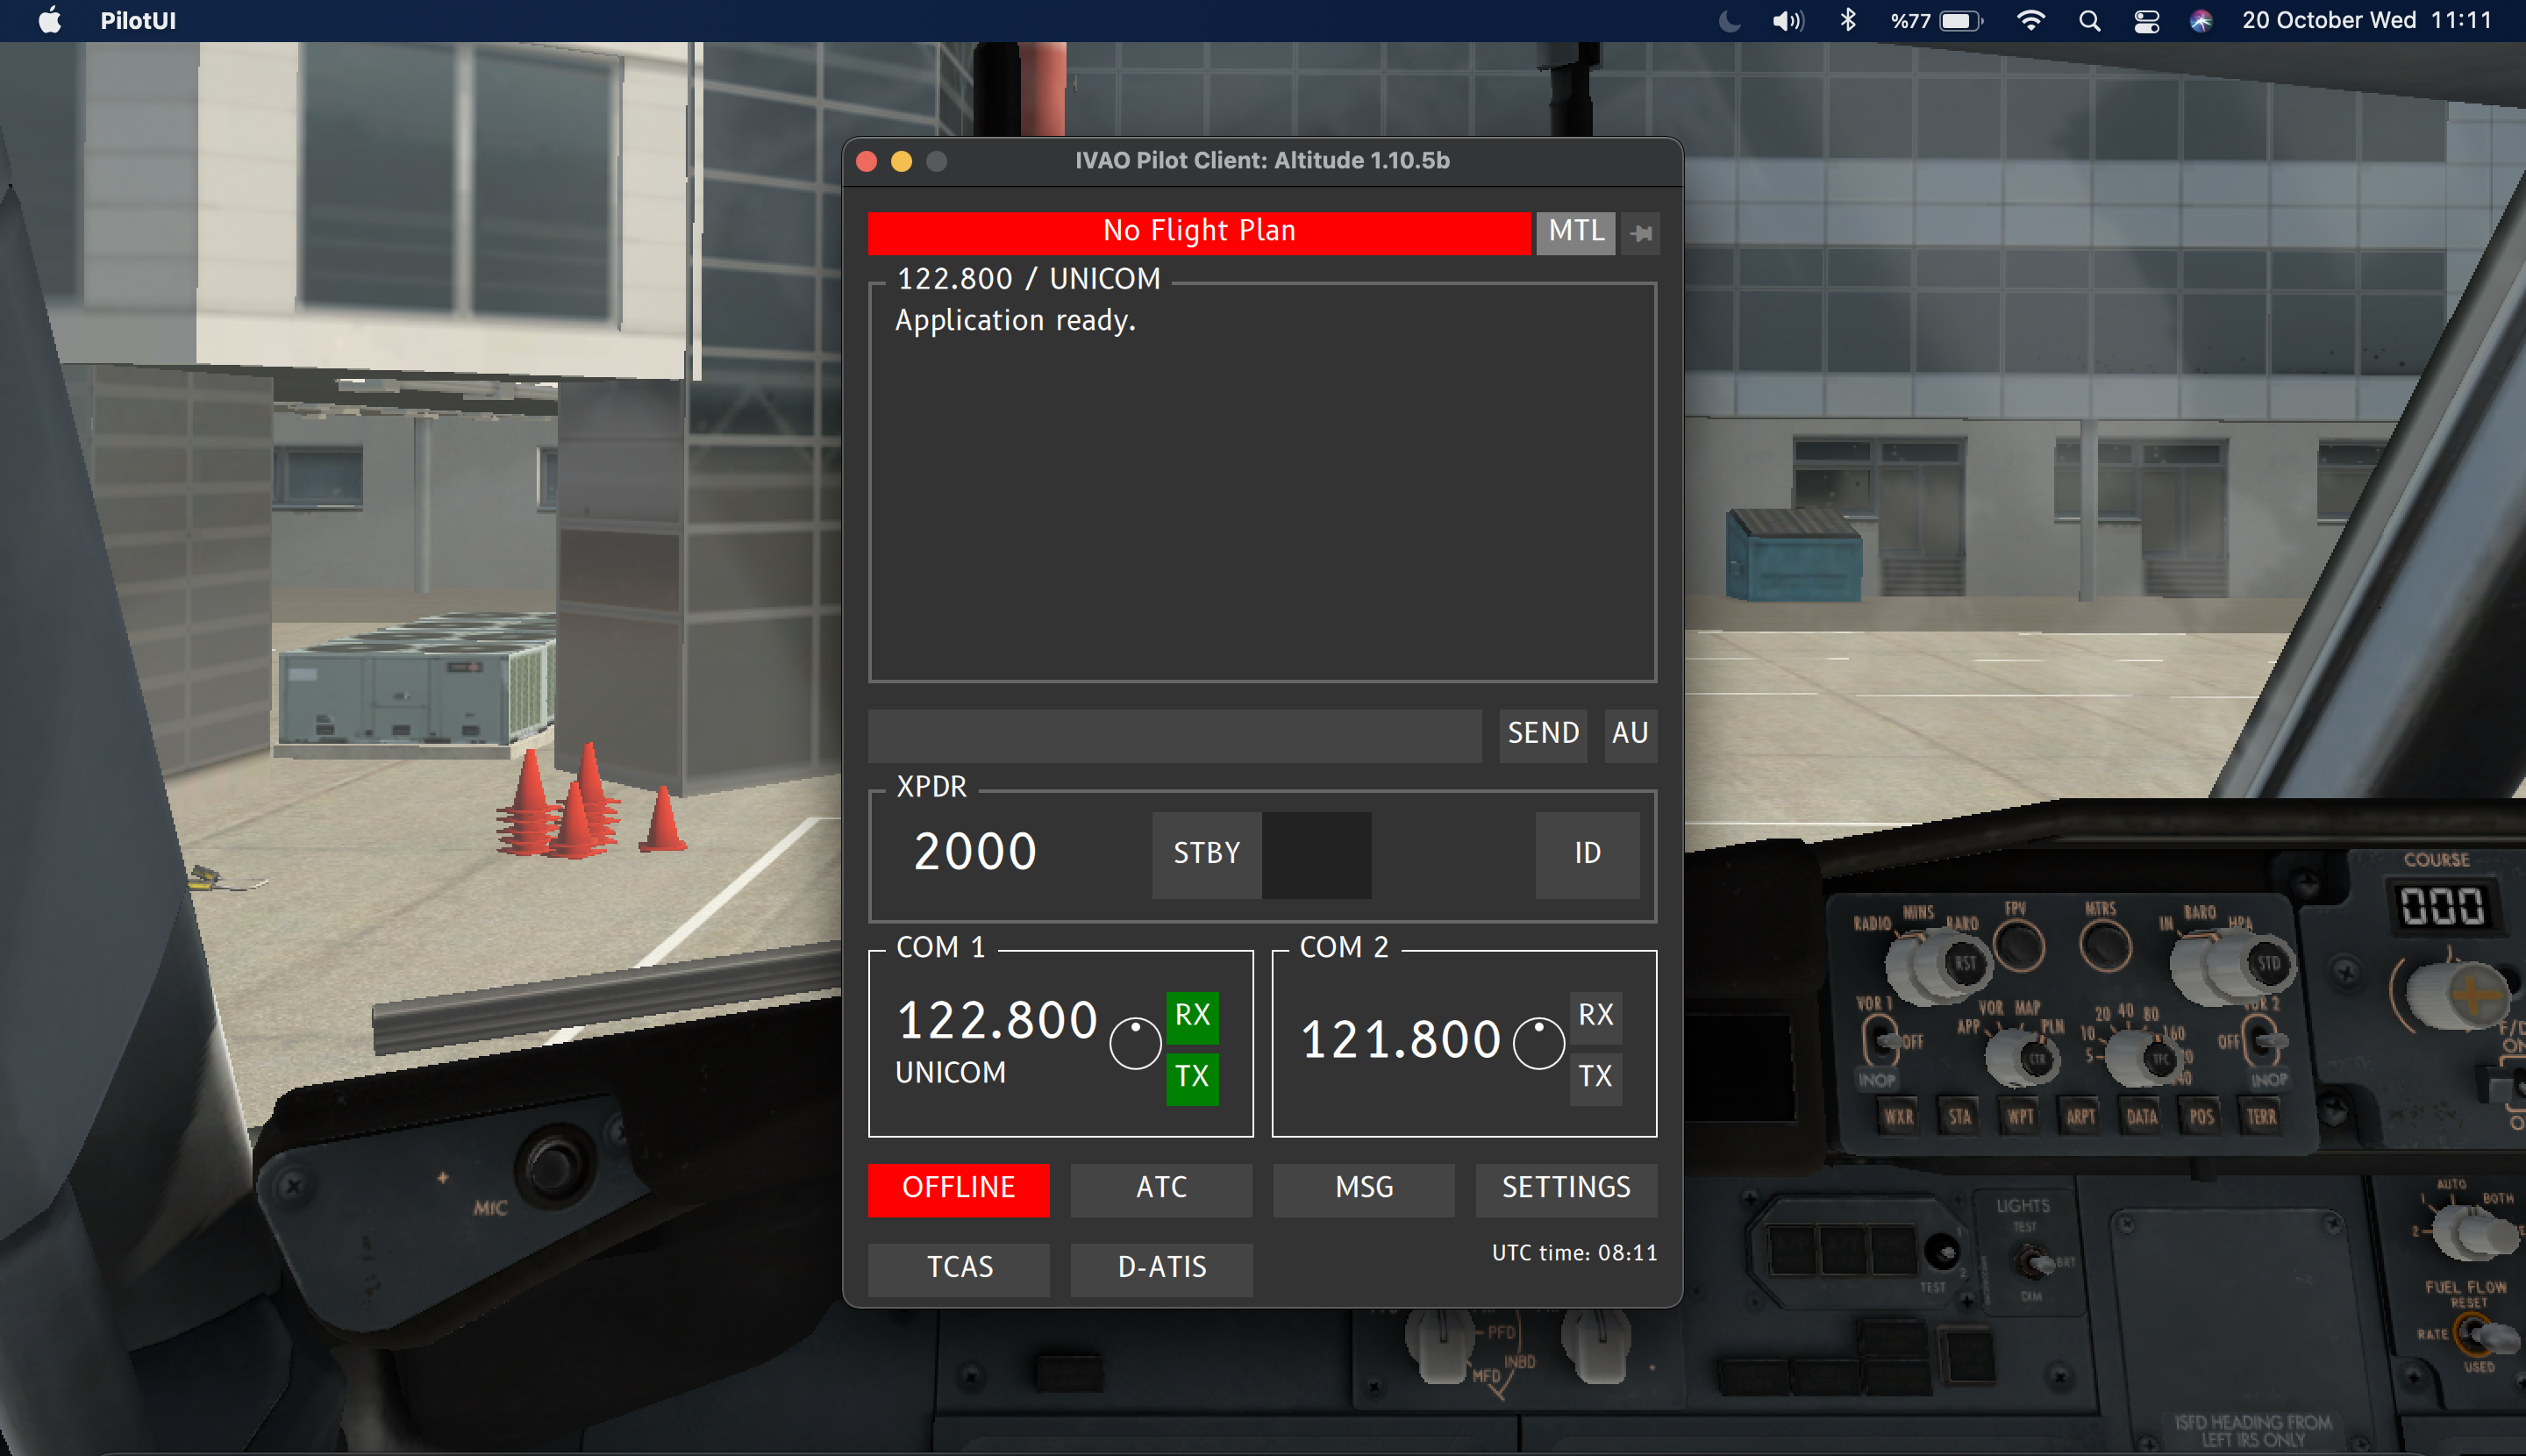
- And you are ready to go!
- Please note that you have to allow “mac.xpl” and “Pilot.UI” only once. macOS will not ask for permissions for the next runs of PilotUI.
- You can learn all about Altitude from our Altitude manual
¶ Author
- VID 545587 - Creation